

Arance
Testers
- Регистрация
- 14.05.2013
- Сообщения
- 99
- Реакции
- 192
- Баллы
- 0


Ниже перечислен контент, предназначенный для развития персонажа с 85 по 99 уровень, используйте спойлеры для просмотра информации о Зонах Охоты, Временных Зонах и Рейдах.
Развитие персонажа
Одиночная охота
|
Групповая охота
|
Рейды
| |||
|---|---|---|---|---|---|
85
|
|
|
|
|
|
86
| |||||
87
|
| ||||
88
| |||||
89
| |||||
90
|
|
|
|
|
|
91
| |||||
92
| |||||
93
|
| ||||
94
| |||||
95
|
|
|
|
|
|
96
| |||||
97
|
|
|
| ||
98
| |||||
99
|
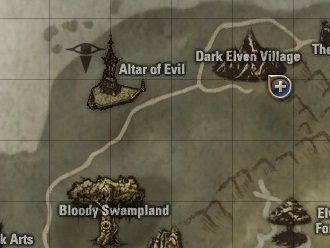
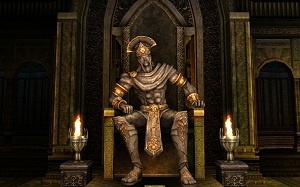
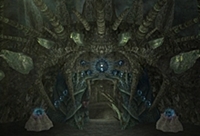
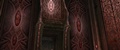
85-86 Алтарь Зла
Алтарь Зла
Алтарь расположен в зоне проживания темных эльфов. Мечты Эмбрио о пробуждении Шилен исполнились, 5 из 7 печатей сломаны. Шилен начала просыпаться и открывать глаза. Апостолы Шилен приносят кровавые жертвы на алтаре, чтобы завершить пробуждение. Алтарь заработал в полную силу, когда на него стала влиять энергия других измерений, порождаемая в Деревне Темных Эльфов.
| Территориальная принадлежность | Земли Орена | |
| Рекомендуемый уровень | 85+ | |
| Рекомендуемый размер группы | 1 человек | |
| Настойки | Выпадают |
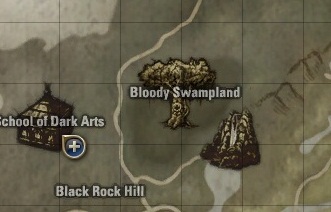
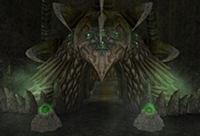
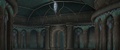
87-89 Кровавые Топи
Кровавые Топи
Обширные болота, граничащие с Лесом Темных Эльфов. Шилен окутала их багровым туманом и пропитала кровью. Запах крови привлекает туда самых сильных и опасных монстров.
| Территориальная принадлежность | Земли Орена | |
| Рекомендуемый уровень | 87+ | |
| Рекомендуемый размер группы | 1 человек | |
| Настойки | Выпадают |
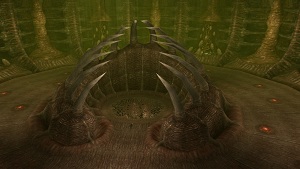
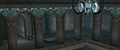
85-89 Семя Уничтожения - Родильная комната
Семя Уничтожения - Родильная комната
Родильная комната - это временная зона, доступна игрокам 85-89 уровней. Нахождение в зоне длится 25 минут, время до повторного входа - 12 часов.
Вход в Родильную комнату осуществляется через красные вихри в Семени Уничтожения. Войдите в вихрь и персонаж будет автоматически перемещен во временную зону.
| Территориальная принадлежность | Земли Кадифа | |
| Рекомендуемый уровень | 85+ | |
| Рекомендуемый размер группы | 1 человек | |
| Настойки | Выпадают |
Как попасть
В Семя Уничтожения можно попасть несколькими способами:
- Телепортироваться через Контроллер Корабля с Базы Альянса Кецеруса.
- Прилететь на Воздушном Корабле с Базы Альянса Кецеруса.
- Телепортироваться через Хранителей Пространства Слуг Гермункуса за 150,000 аден
- Прилететь в полетной трансформации.
Руководство
После перемещения внутрь прямо перед Вами окажется НПЦ Солдат Тай, поговорите с ним, чтобы начать сражение. Уничтожайте монстров - Неудачное Создание, собирайте остатки жизненной энергии (сбор происходит автоматически при убийстве монстра).
- Энергия Восстановления.
Иногда после убийства монстра персонаж будет получать эффект Энергии Восстановления 1-2-3 уровней. Пока действует этот эффект, подойдите к НПЦ Солдат Тай, и он конвертирует это умение в остатки жизненной энергии. - Налетчик Магвен.
При убийстве Неудачного Создания есть вероятность появления Налетчика Магвена. При его появлении на экране появляется предупреждение. Магвен подбежит к персонажу и украдет часть остатков жизненной энергии (не больше 100). Пока он не украл остатки, его невозможно взять в цель, после этого у вас будет очень короткий промежуток времени, чтобы взять его в цель и ударить (не важно умением или просто ударом). Если Вам удалось ударить Магвена, он вернет награбленное. - Награда.
По прошествии 30 минут все монстры исчезнут. Поговорите с НПЦ Солдат Тай и получите награду в зависимости от собранных остатков жизненной энергии. Обменять
Кристаллы Жизненной Энергии на предметы можно у НПЦ Контрабандист Кокран на Базе Альянса Кецеруса.
Обмен Кристаллов Жизненной Энергии
Полученные во временной зоне Семя Уничтожения - Родильная комната
85-99 Лабиринт Картии
Лабиринт Картии
Лабиринт Картии - это временная зона для персонажей 85 и выше уровней, временная зона доступна один раз в день, вход в Лабиринт Картии осуществляется через NPC Исследователь Картии в Адене. Всего существует 6 различных типов лабиринта: для 85, 90, 95 и для каждой разновидности для одиночного и группового прохождения.
Тип
|
Уровни
|
Уровень монстров
|
|---|---|---|
| 85 | 85-89 | 88 уровень |
| 90 | 90-94 | 93 уровень |
| 95 | 95+ | 98 уровень |
Прохождение
Возьмите необходимый квест перед входом в Лабиринт Картии. После входа в Лабиринт Картии перед Вами окажется 5 NPC: Рыцарь, Воин, Лучник, Призыватель и Целитель. Поговорите с Начальником Авангарда Адена и выберите NPC, который НЕ пойдет с Вами в атаку. После выбора откроется дверь, и начнется сражение. Лабиринт Картии состоит из трех комнат, в каждой из которых необходимо убить всех монстров и финального босса, чтобы пройти дальше.
Первая комната
В середине первой комнаты располагается алтарь, где заточены пленники. После входа в комнату начнется первый уровень атаки, монстры будут спускаться по лестнице и нападать на Вас и часть монстров будет нападать на пленников.
Всего в первой комнате 7 уровней, на каждом уровне несколько волн монстров. Обратите внимание, что на каждом уровне часть жизни пленников будет поглощаться. Если Вы сохраните жизнь пленникам, то по окончании 7 уровня они присоединятся и помогут Вам в борьбе с монстрами в следующих комнатах.
На 7 уровне вместе с появлением босса комната будет наполнена ядом, будьте внимательны. После убийства босса Вы сможете подняться вверх по лестнице и пройти во вторую комнату.
При прохождении Лабиринта Картии в одиночку добавлена следующая возможность:
- Если убить монстра "Надзиратель Картии" на 7 этапе первой комнаты, появится монстр "Похититель Жизни".
- Когда HP "Похитителя Жизни" опустится ниже 10%, на персонажа будет наложен положительный эффект "Кипящая Кровь".
- Пока действует эффект "Кипящая Кровь", персонаж в случае смерти будет сразу воскрешен с полными HP, MP и без потери опыта.
Вторая комната
Убивайте монстров во второй комнате. Главное убить мини-босса Надзиратель Картии, после чего откроется проход в третью комнату. Когда у мини-босса уровень HP снизится до 10%, он попытается убежать. Если дать ему убежать, то он появится в составе четвертой волны монстров в третьей комнате с полным HP.
Третья комната
В третьей комнате находится финальный босс Лабиринта Картии. Когда Вы войдете в третью комнату, босс будет находиться в состоянии окаменения, и его невозможно будет взять в цель. Начнется 1 уровень атаки, монстры будут появляться по краям комнаты и нападать на Вас. На 7 уровне атаки финальный босс выйдет из окаменения и также нападет на Вас.
Монстры при одиночном прохождении
Опыт и SP при одиночном прохождении начисляются не за убийство финального босса, а при закрытии временно зоны:
85 уровень: 483,347,222 опыта, 118,102 SP.
90 уровень: 670,413,210 опыта, 161,608 SP.
95 уровень: 970,749,459 опыта, 235,848 SP.
85-89 Подземные Руины Харнака
Подземные Руины Харнака
Подземные Руины Харнака находятся под упавшим на Говорящий Остров древним городом гигантов Эсагира. В них находится могила древнего короля гигантов Харнака. Руины состоят из трех этажей по 8 комнат на каждом. После Перерождения персонажи 85-90 уровней могут спуститься в Руины для охоты в одиночку или в небольшой группе.
| Территориальная принадлежность | Земли Глудио | |
| Рекомендуемый уровень | 85+ | |
| Рекомендуемый размер группы | 5-7 человек | |
| Настойки | Не выпадают |
Как попасть
Подземные Руины Харнака располагаются в центре Говорящего Острова, под Руинами Эсагира.
Переместиться к Подземным Руинам Харнака можно при помощи телепорта или Рамуна из Деревни Говорящего Острова. Вход в Подземные Руины Харнака осуществляется через NPC Слуга Гиганта Хадел в 1ой Зоне Исследований в Руинах Эсагира.
В Подземные Руины Харнака допускаются персонажи 85 и выше уровня, получившие 4-ую профессию. Первый и второй этажи предназначены для охоты в одиночку, третий этаж - для охоты маленькими группами. На каждом этаже есть центральная комната с устройством перемещения между этажами и 8 небольших комнат вокруг. Перемещаться между маленькими комнатами можно через устройства в центре каждой комнаты.
Руководство
Подземные Руины Харнака предназначены для охоты в одиночку на 1 и 2 этажах и небольшими группами на 3 этаже.
При охоте на 1 и 2 этажах монстры не помогают друг другу, только при убийстве монстра с титулом рядом появляется еще один. На 3 этаже монстры состоят из небольших групп: Накдум, Кракос Кракии и Секнос, монстры из разных групп не помогают друг другу.
Каждый раз при убийстве монстра в Подземных Руинах Харнака повышается уровень угрозы от 1 до 300, когда уровень угрозы достигает 300, то все монстры исчезают и заменяются демоническими копиями на 5 - 10 минут. Демонические монстры сильнее, но и награда за их убийство выше.
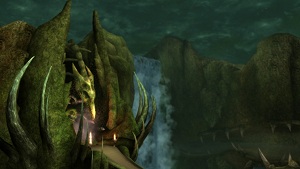
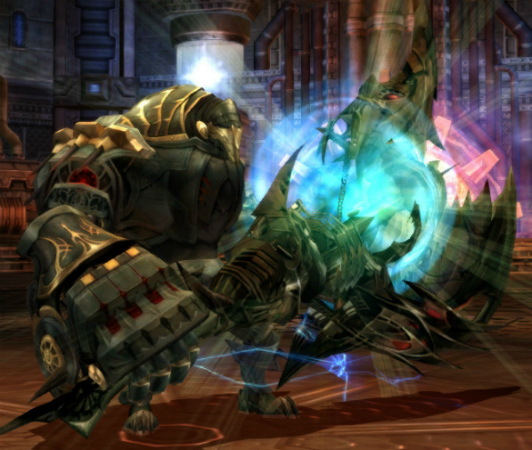
85-89 Семя Уничтожения
Семя Уничтожения
Крепость Истхины, создательницы и повелительницы всех живых существ Семян. В запутанных переходах крепости постоянно происходят столкновения между тремя воюющими между собой местными расами - Бистаконом, Кокраконом и Рептиликоном.
| Территориальная принадлежность | Земли Кадифа | |
| Рекомендуемый уровень | 85-90 | |
| Рекомендуемый размер группы | 5-7 человек | |
| Настойки | Не выпадают |
Как попасть
В Семя Уничтожения можно попасть несколькими способами:
- Телепортироваться через Контроллер Корабля с Базы Альянса Кецеруса.
- Прилететь на Воздушном Корабле с Базы Альянса Кецеруса.
- Телепортироваться через Хранителей Пространства Слуг Гермункуса за 150,000 аден
- Прилететь в полетной трансформации.
Руководство
Монстры имеют уровень 88-89, охотиться здесь достаточно сложно. В Семени Уничтожения можно постоянно собирать энергию стихий, но после того, как энергия собрана, персонаж будет атакован монстром.
Семя Уничтожения разделено на три области: Рептиликон, Кокракон и Бистакон. В каждую зону ведет проход.
| 
| 
|
Вход в Бистакон (Север)
|
Вход в Рептиликон (Восток)
|
Вход в Кокракон (Запад)
|
Хотя Семя и разбито на три области, монстры в каждой из них обладают схожим набором характеристик и используют стихию Земли. Монстры обладают сильными атакующими и ослабляющими умениями.
85-89 Траджан
Траджан
Персонажи 85 уровня и выше, прошедшие Перерождение, в составе группы из 7 человек могут попасть во временную зону Битва с Боссами Траджана. Доступ в зону осуществляется через НПЦ Старейшина Филар в Шутгарте. В отличие от других временных зон, доступ в зону не ограничивается после прохождения.
| Территориальная принадлежность | Земли Шутгарта |
| Рекомендуемый уровень | 85+ |
| Рекомендуемый размер группы | 5-7 человек |
| Настойки | Не выпадают |
| Время отката зоны | Ежедневно - 6.30 |
Описание
Временная зона состоит из пяти секций. В четырех секциях расположены монстры и яйца. Пятая секция это просторный зал, в котором обитает босс зоны - Траджан. При прохождении от входа до зала босса необходимо обратить внимание, что при прохождении рядом с яйцами они начинают сиять желтым цветом, и из них начинают вылупляться жуки, убивайте их по пути к боссу. Также внутри зоны
могут попадаться небольшие участки, при попадании в них на персонажа накладывается эффект отравления.
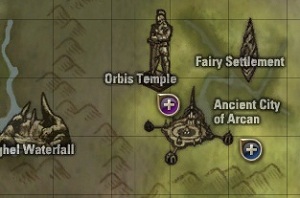
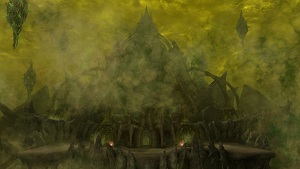
90-94 Колония Фей
Колония Фей
Плохое поведения Короля Фей Обелиуса вынудило богов заблокировать ему доступ в Магмельд. Только Кимериан и его последователи смогли попасть внутрь и обосноваться на землях Магмельда. Однако из-за пробуждения Шилен в Магмельде появилась Тьма, которая вынудила часть фей покинуть зараженные земли, а те, которые остались, в том числе и Кимериан, стали представлять опасность для других жителей Магмельда.

| Территориальная принадлежность | Магмельд |
| Рекомендуемый уровень | 90+ |
Описание
На севере Древнего Города Аркана расположено поселение фей, в котором могут охотиться игроки как соло, так и в группах любого размера. В три региона Колонии Фей Вы можете добраться либо на лифте, либо через Хранителя Портала Рукхи. Северный и южный регионы Колонии соединяет между собой зона рейдового подземелья Кимериана.
Вся территория Колонии покрыта коконами, разбив которые Вы увидите нескольких монстров, которых Вы можете убить. Во время охоты на монстров Вы можете получить
Вокруг коконов летают Блуждающие Огоньки, восстанавливающие HP и МР.
За убийство Фан Дирема и Разрушителя Коконов можно получить предметы для доступа в Обитель Кимериана.
Коконы
Коконы, из которых рождаются феи, бывают 2 видов: Коконы и Большие коконы. Вскрывая кокон, Вы можете регулировать тип монстра, появляющийся оттуда.
Вся территория Колонии Фей покрыта коконами, которые можно открыть или разбить, освободив фей, заключённых внутри Коконов.
- Способы открытия коконов:[/li]
- Используйте на Кокон простую атаку - появится обычный монстр. (Автоатака через Ctrl; выбор строки диалога "Обычная атака".)
- Используйте на Кокон атаку умением - появится обычный монстр с неполным HP. (Атака умением.; выбор строки диалога "Мощная атака".)
- Используйте на Кокон
Слюду - появится монстр с повышенной наградой.

- Есть шанс, что при открытии Кокона он превратится в Зараженный Кокон (его тоже можно разбить), вокруг которого появятся монстры с атакой тьмы.
Эти же монстры появляются, если кокон разбивает Разрушитель Коконов.
90-92 Сад Бытия
Сад Бытия
Эйнхасад созвала ангелов и повелела собрать все самое ценное и прекрасное, что есть в Бытии. С тех пор в Саду Бытия живет даже то, что уже исчезло в физическом мире – например, древние животные или растения. Однако, все эти существа потеряли свою чистоту, подвергшись влиянию Растлевающей Тьмы.
| Территориальная принадлежность | Магмельд | |
| Рекомендуемый уровень | 90+ | |
| Рекомендуемый размер группы | 7 человек | |
| Настойки | Не выпадают |
Руководство
Сад Бытия - зона для охоты группой персонажей выше 90 уровня. Сад Бытия расположен к югу от Древнего Города Аркана. Переместиться в Сад Бытия можно через НПЦ Хранитель Портала Рукхи или через Устройство Телепортации.
- Сад Бытия разделен на поле и сад, сад разделен на 4 секции.
- В поле существуют ивентовые монстры, следующие за Садовником Внешнего Сада во время атаки.
- В каждой из 3 секций сада можно вызвать Рейдового Босса.
- В Саду Бытия есть Лозы, которые обладают разными функциями в дневное и ночное время.
- В каждой из 3 зон сада находятся Смотрители Сада, в случайном порядке ставящие опасные ловушки.
- Здесь существуют ивентовые монстры, которые зависят от того, какие умения используют обычные монстры.
- В центре Сада Бытия находится рейдобый босс Афрос; для проведения рейда вам сначала необходимо добыть
Ключ Афроса в другой зоне Сада. Всего может выпасть 4 ключа по количеству дверей (ключ выпадает случайно).

- Если вы попытаетесь открыть дверь неправильным ключом, то появятся три монстра.
-
Ключ Афроса добывается в самой сложной части Сада Бытия.
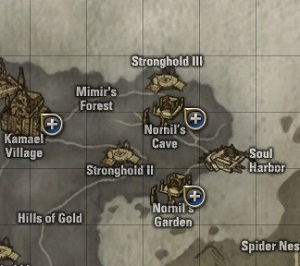
93-94 Подземелье Норнил
Подземелье Норнил
По слухам, в этом подземелье пребывает божество Камаэль Норнил. Пришествие Доктора Хаоса сильно на нем сказывается: оно только и думает, что о мести захватчикам.
| Территориальная принадлежность | Земли Адена | |
| Рекомендуемый уровень | 93+ | |
| Рекомендуемый размер группы | 7 человек | |
| Настойки | Не выпадают |
Как попасть
Чтобы попасть в Подземелье Норнил, используйте Устройство Телепортации в Деревне Камаэль и выберите пункт Алтарь Норнил, после перемещения пройдите немного на юг.
Здесь вы увидите Устройство Передвижения Норнил, с помощью которого сможете легко переместиться в различные области Подземелья Норнил, в т.ч. и в центр, откуда можно попасть во временную зону Сад Норнил.
90-94 Тюрьма Изгнанников Тьмы
Тюрьма Изгнанников Тьмы
В этой тюрьме заточили предводителя повстанцев, дерзнувших бросить вызов богам. Лучи звездного света впиваются в тело Спасии, доставляя ему страшные мучения.
| Территориальная принадлежность | Магмельд | |
| Рекомендуемый уровень | 90+ | |
| Рекомендуемый размер группы | 7 человек | |
| Настойки | Не выпадают |
Как попасть
Тюрьма Изгнанников Тьмы находится под Древним Городом Арканом. Сама по себе зона является обычной зоной охоты, в ней расположен вход во временную зону Временная зона: Рейдовый Босс Спасия. Чтобы попасть внутрь Тюрьмы Изгнанников Тьмы, игрок должен выполнить цепочку квестов для доступа, которая имеет варианты прохождения:
Тень беспокойства, беззвучные слухи
|
Бесконечные тщетные усилия или Вывернутая ось сотворения мира
|
Падший лидер или Брошенные существа
|
Падший лидер и правда о нем или Отдых закончился
|
К месту ссылки предателя
|
Нетленные воспоминания о прошлом
|
Ведьма Орбиса
|
Растлевающая Тьма
|
Хозяин храма
|
Воскресший Хозяин храма
|
Описание
После выполнения серии квестов на доступ, Вы сможете попасть в тюрьму Изгнанников Тьмы через Хранителя Портала Рукхи. Эта зона является обычной зоной охоты, также в ней же выполняются все необходимые задачи для доступа во временную зону Рейдового Босса Спасия:
- Во время охоты на монстров, за их убийство можно будет получить предмет:
Огромное Ядро. Данный предмет необходимо зарядить в установленные в зоне охоты пушки.

- При выстреле из пушки на часть зоны прольется звездный свет, и над попавшими под него монстрами загорится таймер. Если Bы убьете монстра пока таймер не закончил свой отсчет, то из монстра выпадут квестовые предметы:
Осколок Памяти,
 Осколок Утраченной Памяти, которые необходимы для входа во временную зону Рейдового Босса Спасия. Каждый член группы должен иметь эти квестовые предметы. За вход во временную зону Рейдового Босса Спасия тратится один предмет, предметы не передаются. В случае отключения от сервера при повторном входе предмет не тратится.
-
Осколок Памяти нужен для входа во временную зону: Спасия (обычный)
-
Осколок Утраченной Памяти нужен для входа во временную зону: Спасия (экстремальный)
-
90-94 Фортуна
Фортуна
Здесь скрывались повстанцы давних лет, и здесь же нашли успокоение их души, когда они потерпели поражение в войне с Полиной. В настоящее время здесь скрывается герой Фрон, падший и изгнанный из святилища Орбиса, и остатки его людей.
| Территориальная принадлежность | Магмельд | |
| Рекомендуемый уровень | 90+ | |
| Рекомендуемый размер группы | 7 человек | |
| Время отката зоны | Ежедн. - 6.30 |
Описание
- Особенности охоты:[/li]
- Вход в зону возможен группой из 7 человек.
- Вы можете войти с помощью Изшаэля - спутника Эсипины из Древнего Города Аркана.
- Зона состоит из 9-ти этапов, на каждом из которых группу ждет сражение с боссом.
- Доступ в зону сбрасывается каждый день в 6.30 утра.
- Зона представляет собой одну большую комнату с памятником в центре.
- Чтобы полностью завершить инстанс, игрокам необходимо пройти 9 стадий.
- На 1 стадии будут только монстры, которых достаточно легко уничтожить и завершить cтадию.
- На 2 стадии будут те же монстры, но с увеличенным количеством HP, которых сложно убить, также появятся сферы, которые помогут переключать типы монстров на более слабых для легкой зачистки комнаты.
- Во время прохождения стадий специальный НПЦ будет подсказывать, что нужно делать.
- C 3 стадии начнутся боссы.
- Начиная с 4 стадии появится монстр, который будет пожирать сферы, которые необходимы для переключения типов монстров. Его необходимо уничтожить, чтобы он не съел все сферы.
90-94 Истхина
Истхина
Истхина, Королева Уничтожения, рожденная в самом сердце одного из 9 Семян, которые Шилен отправила на землю, наблюдает за тем, что происходит во всех местах Семян из самых глубин. Контраст между мерзкой, очень толстой нижней частью тела Матери-Создателя и ее божественно красивой верхней частью тела и лица поражает всех тех, кто ее видел. Она - олицетворение Семени Уничтожения. Cемя Уничтожение - это создание-паразит, которое поглощает энергию живых существ через корни и Истхина - сущность, населяющая Семя.
| Территориальная принадлежность | Земли Кадифа |
| Рекомендуемый уровень | 90+ | |
| Рекомендуемый размер группы | 7+ человек | |
| Время отката зоны | Среда, суббота - 6.30 |
Описание
В зоне Семя Уничтожения находится легендарный Рейдовый Босс - Истхина в двух вариантах - обычном и экстремальном. Доступ к Рейдовому Боссу осуществляется через NPC Офицер Лимиэр, войти могут игроки 90-99 уровней в составе командного канала в котором до 5 полных групп. Доступ во временные зоны Рейдовых Боссов сбрасывается в среду и в субботу в 6.30 утра.
В зависимости от стадии становится доступной обычная или экстремальная версия Рейдового Босса.
- Истхина (обычная) доступна во временной зоне Логово Истхины во время третьей и пятой стадии для командных каналов в составе не менее 7 человек;
- Истхина (экстремальная) доступна во временной зоне Логово Истхины (экстремальный) во время четвертой стадии цикла для командных каналов в составе не менее 14 человек.
Стадия
|
Описание
|
|---|---|
1 стадия
| Убивайте монстров в Семени Уничтожения, по достижении определенного результата в 13.00 Семя Уничтожения перейдет на 2 стадию цикла. |
2-3 стадии
| 2 стадия длится 2 недели, после этого наступает 3 стадия. Во время 3 стадии становится доступна Истхина (обычная). |
3 стадия
| Если игроки сразили Истхина (обычная) 10 и более раз, то в Понедельник в 13.00 Семя Уничтожения переключится на 4 стадию. Во время 4 стадии становится доступна Истхина (экстремальная). |
4-5 стадии
| Если во время 3 стадии игроки не сразили Истхина (обычная) 10 раз, то Семя Уничтожения переключится сразу на 5 стадию. 5 стадия длится 3 недели, после чего Семя Уничтожения возвращается на 1 стадию. |
Истхина символизирует собой землю. Она использует энергию живых существ, которую поглощает семя, ради того, чтобы создавать существ, которые будут жить на Семенах. Ее создания являются противоположностями творений Эйнхасад и продолжают развитие мутаций под наблюдением Истхины. Конечным итогом ее работы является создание существ, которые олицетворяют апофеоз уничтожения, разрушения и зла, которое можно обрушить на мир живых существ.
90-94 Спасия
Спасия
Логово Спасии - временная зона, рассчитанная на игроков 90 - 95 уровней. Необходимое количество человек в группе: 7, время до повторного входа: 4 часа после закрытия временной зоны.
| Территориальная принадлежность | Магмельд |
| Рекомендуемый уровень | 90+ | |
| Рекомендуемый размер группы | 7 человек |
Общие сведения
Вход во временную зону находится в Тюрьме Изгнанников Тьмы. Для доступа каждый член группы должен иметь предмет:
-
Осколок Памяти нужен для входа во временную зону: Спасия (обычный)
-
Осколок Утраченной Памяти нужен для входа во временную зону: Спасия (экстремальный)
Вход к Рейдовому Боссу Спасия, осуществляется через NPC Надгробие Спасии в центре Тюрьмы Изгнанников Тьмы.
- Спасия (обычный)
Необходимое количество человек: 7 человек
Время до повторного входа: 4 часа после закрытия временной зоны - Спасия (экстремальный)
Необходимое количество человек: 7 человек
Время до повторного входа: ежедневно в 6.30.
Руководство по прохождению
1 этап - Сад Бытия
После входа через Надгробие Спасии группа окажется во временной зоне - копии Сада Бытия. Группа будет разбросанна по всей его территории. Основная задача - найти Устройство для Побега и активировать его. Поиску устройства будут активно мешать обитающие в локации монстры - Копьеносец-Ящерица и Шаман-Ящерица. Шаман-Ящерица способна телепортировать игрока в произвольное место во временно зоне. Кроме этого необходимо уложиться в определенное время. Дается 3 попытки: 5 минут, 7 минут, 10 минут. Если Вы не укладываетесь во время, то устройство выхода перемещается в другое место Сада Бытия. Как только устройство найдено, каждый игрок должен активировать его, нажав на первую строчку, а лидер группы затем отправит всех во 2 этап - Храм Орбиса.
2 этап - Храм Орбиса
После перемещение через Устройство для Побега группа окажется по временно зоне - копии Храма Орбиса. Необходимо активировать 3 бомбы и уничтожить лидера демонов безумия Спасии.
Каждая бомба охраняется монстрами. Как только Вы уничтожите монстров, активируйте бомбу и оставляйте охранять её одного из членов группы, поскольку бомбу начнут атаковать другие монстры, и необходимо не допустить ее взрыв.
В центральном зале временной зоны будет стоять лидер Демонов с охраной. После его уничтожения бегите к открывшемуся порталу. После ролика окажетесь в зоне с Рейдовым Боссом Спасией.
Тактика убийства босса следующая: практически сразу после появления босс встанет в режим неуязвимости. Чтобы его сбросить, необходимо из Миньонов Спасии выбить предмет
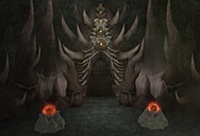
95-96 Запретные Врата
Запретные Врата
Благодаря взаимодействию гигантов, людей и Эйнхазад, Шилен была запечатана за 7 печатями, но согласно пророчеству, настанет тот день, когда Шилен воскреснет и проснется. В мире появится воплощение Шилен. Организация Эмбрио открывала печати одну за одной, открыла глаза Шилен, но у нее не хватило сил и ресурсов даже через жертвоприношения довести обряд воскрешения до конца. Сам алтарь Шилен находится в закрытом подвале, а вход к нему охраняют монстры, созданные организацией Эмбрио.
| Территориальная принадлежность | Земли Адена | |
| Рекомендуемый уровень | 95+ | |
| Рекомендуемый размер группы | 1 человек | |
| Настойки | Выпадают |
Общие сведения
Игроки 95 и выше уровней могут охотиться в одиночку на обитающих в зоне монстров. Переместиться сюда можно через NPC Элиза из Адена.
На территории данной локации каждую пятницу, субботу и воскресенье в 02.00, 14.00 и 20.00 стартует квест-кампания Печать Шилен, удачное завершение которой открывает доступ в Алтарь Шилен.
95-96 Остров Душ
Остров Душ
Остров, на котором живут Камаэль. Долгое время путь туда был закрыт.
| Территориальная принадлежность | Земли Адена | |
| Рекомендуемый уровень | 92+ | |
| Рекомендуемый размер группы | 2-4 человека | |
| Настойки | Выпадают |
Общие сведения
Игроки 92 и выше уровней могут охотиться в одиночку на обитающих в зоне монстров.
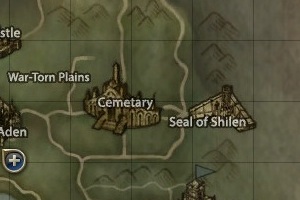
97-99 Кладбище Короля Змей
Кладбище Короля Змей
В этих священных местах некогда хоронили святых и лиц благородной крови. Однако недавно древнее кладбище было осквернено. Прежний владыка Адена Трэвис восстал из мертвых и теперь убивает тех, кто осмелится появиться на кладбище, а затем воскрешает несчастных и делает своими рабами. По приказу короля Амадэо к кладбищу стягиваются войска, чтобы навеки упокоить несчастного монарха, попавшего под влияние темной магии Шилен.
| Территориальная принадлежность | Земли Адена | |
| Рекомендуемый уровень | 97+ | |
| Рекомендуемый размер группы | 1 человек | |
| Настойки | Не выпадают | |
| Рекомендуемые классы | Волшебник Фео, Целитель Альгиза |
Общие сведения
Игроки 97 и выше уровней могут охотиться в одиночку на обитающих в зоне монстров.
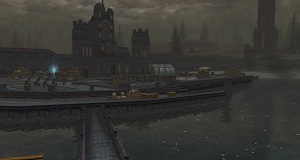
95-99 Храм Орбиса
Храм Орбиса
Место упокоения возлюбленных богами героев эпохи Гигантов. К сожалению, порожденная Шилен Растлевающая Тьма коснулась павших героев, и они обезумели.
Храм Орбиса располагается севернее Древнего Города Аркана. Зона предназначена для игроков 95+. Попасть в Храм Орбиса можно из Древного Города Аркана через НПЦ Хранитель Портала Рукхи.
| Территориальная принадлежность | Магмельд | |
| Рекомендуемый уровень | 95+ | |
| Рекомендуемый размер группы | 14+ человек |
Прохождение
Храм Орбиса состоит из трех уровней. На третьем этаже располагаются Комната Доблести и Комната Мудрости. Рейдовые Боссы в зоне охоты появляются в случайном месте.
Также у входа в Храм Орбиса находится НПЦ Посланник Бога Типиа, который предлагает квесты на сражение с боссом Октависом. Зона Битва с Октависом рассчитана на игроков 95+ в количестве от 2 полных групп (от 7 чел.), сброс возможности входа в зону происходит каждую Среду и Субботу в 6.30 утра. Зона Битва с Октависом (битва на пределе) рассчитана на игроков 97+ в количестве от 2 полных групп (от 14 чел.), сброс возможности входа в зону происходит каждую Среду в 6.30 утра.
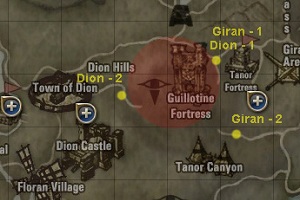
95-96 Крепость Гильотина
Крепость Гильотина
Обновленная зона охоты для персонажей 95 уровня и выше - Крепость Гильотина располагается к востоку от Диона. Несмотря на расположение в Крепость Гильотина невозможно переместиться при помощи телепорта из Диона, а только при помощи рамуна (системы перемещения для Перерожденных персонажей) из Диона и Гирана (рамун рядом с Храмом Эйнхасад). Но запомните, что конечные точки рамуна при перемещении из Диона и Гирана отличаются, всего существует 3 точки высадки рядом с Крепостью Гильотина. Также, выполняя связанные квесты можно получить в награду
| Территориальная принадлежность | Земли Диона | |
| Рекомендуемый уровень | 95+ | |
| Рекомендуемый размер группы | 5-7 человек | |
| Настойки | Выпадают |
Щит Хаоса
Большинство монстров, появляющихся в Крепости Гильотина, появляются под защитой Щита Хаоса. Щит Хаоса сильно повышает физическую и магическую защиту монстра, и его очень сложно убить. Но при получении определенного количества урона Щит Хаоса исчезает. После уничтожения Щита Хаоса защита монстра сильно уменьшается, и его легко убить.
Доказательство Выжившего
Во время охоты на нежить в Крепости Гильотина есть вероятность получить
Прыжки (Рамун)
Внутри Крепости Гильотина также располагаются точки для перемещения с помощью прыжков. Например, Рейдовый Босс располагается в точке, которая доступна только при помощи прыжков. Заметьте, что в Крепости Гильотина днем и ночью водятся разные монстры.
Монстры
Большинство монстров в Крепости Гильотина - нежить и демоны, также существуют монстры, которые появляются только ночью. Большинство монстров в Крепости Гильотина появляются и днем, и ночью, однако Крутати, Обаятельная Ирен и Папюлон появляются только ночью с 0:00 до 6:00 по игровому времени.
97-99 Семя Адского Пламени
Семя Адского Пламени
Это четвертое семя, располагающееся на территории Грации. Управляет семенем Таути. Семя Адского Пламени как и другие области Грации обладает циклической структурой доступа к рейдовому боссу зоны - Таути.
В Семени Адского Пламени обитают монстры Софа и Кунда.
Переместиться в Семя Адского Пламени и другим семенам на континенте Грация можно при помощи Телепорта Семени.
| Территориальная принадлежность | Земли Кадифа | |
| Рекомендуемый уровень | 97+ | |
| Рекомендуемый размер группы | 2-4 человекa | |
| Настойки | Не выпадают |
Разделение на этажи
Семя Адского Пламени состоит из трех этажей, каждый этаж разделен на северную и южную части. Заметьте, что в северной части каждого этажа сконцентрировано большое количество монстров - для более удобной охоты группой, а в южной части каждого этажа плотность мобов меньше, что позволяет охотится соло или маленькой группой. Таким образом, независимо от состава группы можно подобрать место для охоты.
Этапы цикла и сбор
Так же, как и другие семена на континенте Грация, Семя Адского Пламени имеет циклы охоты, которые изменяются в зависимости от набранных игроками баллов. Семя Адского Пламени имеет два этапа в цикле, переключение между этапами зависит от количества убийств босса Таути. Когда Семя находится в первом этапе цикла, через NPC доступно перемещение на 1 и 2 этажи, а когда Семя переходит на второй этап цикла, становится доступным 3 этаж. Охота на третьем этаже может быть достаточно сложной, но здесь доступен сбор энергии стихий. 2 этап цикла длится 24 часа, и затем Семя переключается обратно на 1 этап.
97-99 Языческий Храм
Языческий Храм
Дворяне Руны построили в укромном месте этот храм для поклонения демону Тиролю. Там они собираются в последний день каждого лунного месяца, проводят тайные ритуалы и приносят кровавые жертвы.
| Территориальная принадлежность | Земли Руны | |
| Рекомендуемый уровень | 97+ | |
| Рекомендуемый размер группы | 5-7 человек | |
| Настойки | Не выпадают |
Как попасть
Ранее, для входа в Языческий храм требовалось выполнить квесты - Поиски истины и затем - Языческий Храм (квест). Однако в связи с обновлением данной зоны охоты старые квесты были удалены, и для доступа потребуется выполнить новые квесты Заговор за дверью и Голос господства. После выполнения квеста Заговор за дверью появится доступ в зал ожидания, а после выполнения квеста Голос господства - в часовню Языческого Храма.
После выполнения квестов Заговор за дверью и Голос господства Вы сможете перемещаться ко входу в Языческий Храм через NPC - Главный Рыцарь Каргос в Руне.
Области охоты группой/в одиночку
Языческий Храм разделен на область ожидания и часовню. Область ожидания предназначена для охоты в одиночку или небольшой группой, часовня предназначена для охоты полной группой. В часовне можно убивать монстров как по одному, так и собирать группы монстров для охоты с копьем.
В зале ожидания и в часовне могут появляться монстры - Верховный Жрец Тироля, которые самоуничтожаются через 30 сек., однако после уничтожения появляются монстры, за убийство которых можно получить большое количество опыта.
В Языческом Храме находится Рейдовый Босс - Андреас ван Холтер, комната босса всегда открыта.
Кровь Язычника
Убивая монстров и выполняя квесты в Языческом Храме, можно получить предмет
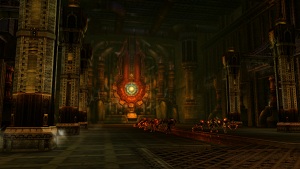
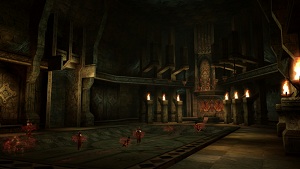
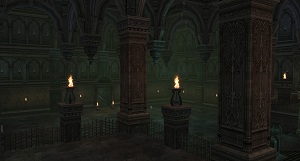
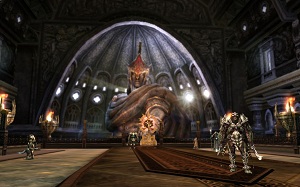
95-96 Алтарь Шилен
Алтарь Шилен
Благодаря Эмбрио, мечтавшему о возрождении Шилен, Семь Печатей были сломаны, и Богиня Разрушения пробудилась ото сна. Чтобы сохранить душу Шилен, Эмбрио создал гигантский Алтарь, впитывающий энергию из жертв, которые присылали из Катакомб и Некрополя.
Алтарь Шилен - это временная зона для 1 полной группы 95 уровня и выше.
| Территориальная принадлежность | Земли Адена | |
| Рекомендуемый уровень | 95+ | |
| Рекомендуемый размер группы | 7 человек |
Руководство
Внутри алтаря находится NPC Элькардия. Вместе с ней Вы посмотрите на процесс жертвоприношения Шилен. Ваша задача - помешать процессу жертвоприношения.
Алтарь состоит из 3 этажей. На 3 этаже стоят рейдовые боссы Мелисса, Исадора, также вы можете получить Знак Путешественника.
1 этаж
Элькардия откроет проход к залу с жертвоприношениями, и Вам необходимо в течение 15 минут пройти через 3 комнаты и убить финального босса этажа Падший Главный Рыцарь. Если не уложитесь в лимит времени, то босс уйдет из алтаря. Сложность заключается в том, что он не убиваем до тех пор, пока жив ключевой монстр этажа - Верховный Экзекутор.
2 этаж
После того, как был убит Падший Главный Рыцарь, Элькардия откроет Вам доступ на 2 этаж. Механика его прохождения такая же, как и на 1 этаже, только боссом будет Падший Верховный Жрец и прежде, чем он станет убиваемым, необходимо убить ключевого монстра Длань Шилен. На прохождение этажа дается 10 минут.
3 этаж
После зачистки 2 этажа Элькардия откроет вход на 3 этаж. На этом этаже нет лимита времени. В каждой комнате стоит по монстру.
После убийства монстра дверь открывается на 5 секунд, и если Вы не уложились в лимит, то монстра убивать надо заново.
После 3 комнаты вас ждет Страж Апокалипсиса Рикки, который отправляет на рейд против Мелиссы и Исадоры.
95-96 Октавис
Октавис
Логово Октависа - групповая временная зона, рассчитанная на 7-35 игроков 95-97 уровней. Вход во временную зону расположен в Храме Орбиса. Попасть в Храм Орбиса можно из Древного Города Аркана с помощью NPC Хранитель Портала Рукхи.
- Чтобы сразиться с Октависом, поговорите с NPC Типиа, которая находится внутри Храма Орбиса.
- Для входа необходим командный канал.
- Доступ во временную зону Логово Октависа сбрасывается в среду и в субботу в 6:30 утра.
- На прохождение временной зоны дается 2 часа.
| Территориальная принадлежность | Магмельд |
| Рекомендуемый уровень | 95+ |
| Рекомендуемый размер группы | 7 человек |
Руководство по прохождению
Перед началом боя будет показан видеоролик, в котором Октавис спускается по воздуху в своей колеснице. Бой с Октависом разделен на 3 этапа.
1 этап
На 1 этапе Октавис будет перемещаться по кругу, нанося мощный урон выстрелами персонажам. На этом этапе Босса нельзя выбрать в цель и атаковать до тех пор, пока здоровье везущих его колесницу Зверей Октависа не будет опущено ниже 50%. После этого необходимо опустить здоровье самого Октависа до минимального значения, чтобы начался следующий этап боя.
2 этап
После видеоролика Октавис останется в центре комнаты. На этом этапе он будет применять атаки ближнего боя, использовать отталкивающее умение и иногда призывать помощников Зверей Арены Гладиаторов и Гладиаторов Октависа. Когда уровень здоровья Октависа опустится до минимального значения, начнется следующий этап боя.
3 этап
После видеоролика Октавис останется в центре комнаты. На этом этапе Октавис использует в основном магические атаки, а также призывает помощников - Старший ученый Октависа.
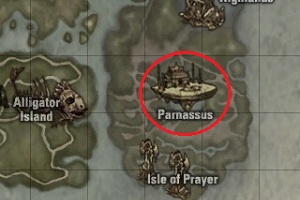
97-99 Хрустальный Лабиринт
Хрустальный Лабиринт
Обитель Ведьмы Парме. Удивительно красивое место, но путь туда никому неизвестен.
| Территориальная принадлежность | Земли Иннадрил | |
| Рекомендуемый уровень | 97+ | |
| Рекомендуемый размер группы | 7 человек |
Как попасть
Телепорт из Хейна доставит персонажа на Парнас на Кристальном Острове.
Отсюда можно попасть во временные зоны - Перламутровый Зал, Огненный Коридор, Коралловый Сад через Портал в Хрустальный Лабиринт.
Эти временные зоны доступны в следующее время:
Время
|
Пн
|
Вт
|
Ср
|
Чт
|
Пт
|
Сб
|
Вс
|
|---|---|---|---|---|---|---|---|
00.00 - 17.59
|
Перламутровый Зал
|
Коралловый Сад
|
Огненный Коридор
|
Перламутровый Зал
|
Коралловый Сад
|
Огненный Коридор
|
Перламутровый Зал
|
18.00 - 23.59
|
Огненный Коридор
|
Перламутровый Зал
|
Коралловый Сад
|
Огненный Коридор
|
Перламутровый Зал
|
Коралловый Сад
|
Огненный Коридор
|
Также на Парнасе находится Портал в Кристальную Тюрьму, через который можно попасть к Рейдовым Боссам Байлор и Валлок. Доступ к Байлор сбрасывается ежедневно в 6.30, доступ к Валлоку сбрасывается каждую Среду и Субботу в 6.30.
Временные зоны Хрустального Лабиринта
Хрустальный Лабиринт
|
Название Зоны
|
Рекомендуемый уровень
|
Описание
|
|---|---|---|---|

|
Перламутровый Зал
|
97+
| Зона доступна в Понедельник, Вторник, Четверг, Пятницу и Воскресенье. Можно бросить вызов Рейдовому Боссу Эмамбифи. |
|
Огненный Коридор
|
97+
| Зона доступна в Понедельник, Среду, Четверг, Субботу и Воскресенье. Можно бросить вызов Рейдовому Боссу Кечи. |
|
Коралловый Сад
|
97+
| Зона доступна во Вторник, Среду, Пятницу и Субботу. Можно бросить вызов Рейдовому Боссу Михаэль. |
|
Зал Кораллового Сада
|
97+
| Если пройти Перламутровый Зал, Огненный Коридор или Коралловый Сад за 40 минут или меньше, то группа получит 10 минут к бонусной зоне. |

|
Кристальная Тюрьма
|
97+
| Через Портал в Кристальную Тюрьму можно попасть к Рейдовым Боссам Байлор и Валлок. Доступ к этим рейдовым боссам сбрасывается каждую Среду и Субботу в 6.30. |
97-99 Таути
Таути
В обновлении Tauti добавлена новая зона охоты Семя Адского Пламени в которой располагается новая временная зона для игроков 97 уровня и выше - зона Рейдового Босса Таути. В случае успешного рейда можно получить Оружие Таути и редкие аксессуары.
| Территориальная принадлежность | Земли Румварса |
| Рекомендуемый уровень | 97+ |
| Рекомендуемый размер группы | 14-35 человек |
Как попасть
Во временную зону Рейдового Босса Таути допускаются персонажи 97+ уровня. Доступ во временную зону обычной сложности осуществляется через NPC Сидзураку, доступ во временную зону экстремальной сложности осуществляется через NPC Аку. В зависимости от выбранной сложности для доступа потребуются различные предметы.
Предметы, необходимые для доступа, можно получить выполняя ежедневные квесты Поддержка сил сопротивления и Петра высшего качества. Сброс доступа во временную зону босса Таути происходит в среду в 6.30 утра, условия доступа перечислены в таблице ниже:
Сложность рейда
|
Кол-во игроков в рейде
|
NPC для входа
|
Необходимый предмет
|
Как получить необходимый предмет
|
|---|---|---|---|---|
Таути (обычный)
|
7-35 человек
|
Сидзураку
|
Поддержка сил сопротивления
| |
Таути (экстремальный)
|
14-35 человек
|
Аку
|
Петра высшего качества
|
Прохождение - обычная сложность
Рейд на Таути проходит по 3 этажам, в зависимости от сложности рейда прохождение отличается, для обычной сложности прохождение следующее:
1 этаж
На 1 этаже вам встретятся революционно настроенные Софа, которые собираются напасть на Таути, им противостоят Кунда, верные Таути. Можно проигнорировать Софа и пройти мино, но если они проиграют, то рейд на Таути будет считаться проигранным, поэтому лучше остановиться и помочь Софа разобраться с Кунда. После этого поднимайтесь на 2 этаж.
Внимание, время рейда на Таути ограничено - 1 час.
2 этаж
На 2 этаже в конце комнаты находятся 2 монстра Лорд Кунда и Захак, которых необходимо убить. С Захака выпадает
3 этаж
На 3 этаже находится Рейдовый Босс Таути.
Перерождение
Перерождение для основных рас
Персонажи, достигшие 85 уровня, могут пройти квест на 4-ю профессию (Перерождение):
Задание
|
Тип
|
Уровень
|
Стартовый NPC
|
Награда
|
|---|---|---|---|---|
Преодолеть Рок
|
85
|
Сельфин
|
|
Описание
Преодолеть Рок
●Английское название: Seize Your Destiny
●Уровень: 85+
●Тип квеста: Квест на четвертую смену профессии выполняется в одиночку/Неповторяемый квест
●Раса: Люди, Эльфы, Темные Эльфы, Орки, Гномы, Камаэль
●Класс: Любой класс
●Стартовая локация: Деревня Говорящего Острова / Земли Глудио
●Стартовый НПЦ: Сельфин
●Награда:
▪
▪
▪
Описание
- Поговорите со Слугой Гиганта Сельфином в Музее Деревни Говорящего Острова, в диалоге выберите "Квест".
▪ Поговорите с Пантеоном в Лобби Музея, чтобы перенестись внутрь Музея. - Поговорите со Слугой Гиганта Хадел в 1 Зоне Исследования Руин Эсагира, персонаж будет перемещен в Разрушенный Лабиринт.
- Персонаж переместится в комнату, где будут находиться 8 представителей каждой профессии. Дождитесь, пока первый соперник выйдет в середину комнаты, и только после этого атакуйте его, затем следующего и т.д. Если вы атакуете не дождавшись, все 8 монстров набросятся на персонажа. После уничтожения последнего соперника появятся вихри. Подойдите к ним и подождите, пока они наделят персонаж силой гигантов.
- Пройдите в следующую комнату.
▪ Сначала в комнате появится один соперник, соответствующий классу, в который будет Перерождаться персонаж (т.е., например, Глас Судьбы встретится с Заклинателем Иса Секносом), убейте его. Периодически в процессе сражения будут появляться посередине экрана иконки будущих умений перерождения, используйте их для более эффективного убийства (кликайте по ним мышкой).
▪ После убийства первого соперника появятся сразу три соперника и одновременно нападут на персонажа, убейте их.
▪ После этого в центре комнаты появятся источник силы и десять противников. Необходимо приблизиться к источнику силы: персонаж получит максимальную защиту на 1 минуту. Максимальная защита будет накладываться всего 3 раза, за это время необходимо уничтожить противников. После этого появится один более сильный соперник, уничтожьте его, используя силу Гигантов (кликайте мышкой по появляющимся иконкам посередине экрана). После этого откроется проход в третью комнату. - В третьей комнате находится главный монстр - Дух Харнака. После начала битвы и падения своего уровня здоровья меньше 50%, Дух Харнака призовет помощь, и в комнате появятся два устройства для снятия печатей. Необходимо "поговорить" с обоими устройствами и выбрать в диалоге "Снять печать". После разговора с первым устройством начнется отсчет времени, и надо за 1 минуту поговорить со вторым устройством. Дух Харнака будет уничтожен.
- Поговорите с Последним Гигантом Гермункусом, который появится в комнате и получите в награду
Записи Ада. Персонаж будет перемещен в Гробницу Духа для завершения процесса Перерождения.

Для завершения процесса Перерождения поговорите со статуей, представляющей нужную вас профессию, в Гробнице Духа.
Вы получите исчерпывающие сведения о тех умениях, которые будут оставлены персонажу, и характеристиках и назначении выбранного класса.
Во время Перерождения ВСЕ умения будут удалены и заменены умениями максимального уровня, но без улучшений, которые в дальнейшем будут заменяться новыми умениями. Персонаж получит в качестве компенсации
По завершении Перерождения персонаж получит
Перерождение для Артей
По достижении 85 уровня вам придет письмо, позволяющее переместиться в Башню Слоновой Кости и начать квест на 3-е Освобождение:
Задание
|
Тип
|
Уровень
|
Стартовый NPC
|
Награда
|
|---|---|---|---|---|
Ветра судьбы, Выбор
|
85
|
Аркениас
|
|
Описание
Ветра судьбы, Выбор
●Английское название: Winds of Fate: Choices
●Уровень: 85+
●Тип квеста: Квест на третье освобождение выполняется в одиночку/Неповторяемый квест
●Раса: Артеи
●Класс: Любой класс
●Стартовая локация: Башня Слоновой Кости / Земли Орена
●Стартовый НПЦ: Аркениас
●Награда:
▪
▪
▪
▪
Описание
- На 3-м этаже Башни Слоновой Кости в Гильдии Светлых Магов можно найти Великого Магистра Аркениас. Поговорите с ней.
- Отправляйтесь на охоту в Кратер Башни Слоновой Кости. Цель охоты - Сумеречное Око, Сумеречная Сила, Сумеречный Голем.
- Поговорите с Великим Магистром Аркениас на 3-м этаже Башни Слоновой Кости.
- Смешайте все ингредиенты в Алхимической Ступке, которую можно найти в магазине на 1-м этаже подземелья Башни Слоновой Кости.
- Поговорите с Великим Магистром Аркениас на 3-м этаже Башни Слоновой Кости.
- Поговорите с Архимагом Хардином в Академии Хардина.
- Поговорите с Икаром, Королем Личей.
- Поговорите с Ведьмой Атреей в Долине Смерти.
- Найдите краску в Коробках Атреи. Необходимо получить
Вещи Атреи — 4 шт.

- Поговорите с Ведьмой Атреей в Долине Смерти.
- Поговорите с Икаром, Королем Личей.
- Для воинов: Поговорите с Мастером Катриной в Беноне.
- Для мистиков: Поговорите с Магистром Арис в Беноне.
- Поговорите с Верховным Жрецом Терениусом в Беноне.
- Найдите Священный Кубок в Зале Предсказаний. Для этого уничтожайте монстров вместе с Кайном, перемещаясь из зала в зал, помощник Кайна будет вас лечить. (Если Вы случайно покинули Зал Предсказаний, Верховный Жрец Терениус поможет Вам снова туда попасть.)
- Поговорите с Верховным Жрецом Терениусом в Беноне.
- Поговорите с Королевой Серенией в Беноне и получите награду.
Экипировка
Роль в группе
|
Рекомендуемое оружие
|
Рекомендуемая броня
|
Перерождаемые классы | |
|---|---|---|---|---|
Рыцарь Сигеля
|
Танк
|
|
Тяжелая
|
|
Воин Тира, Заступник Сайхи |
Воин ближнего боя
|
|
Тяжелая, Легкая |
|
Разбойник Одала
|
Воин ближнего боя
|
|
Легкая
|
|
Лучник Эура
|
Воин дальнего боя
|
|
Легкая
|
|
Волшебник Фео, Громовержец Сайхи |
Маг дальнего/ближнего боя
|
|
Легкая, Магическая |
|
Призыватель Веньо
|
Воин/Маг, смешанный тип
|
|
Легкая, Магическая |
|
Целитель Альгиза
|
Целитель
|
|
Легкая, Магическая |
|
Заклинатель Иса
|
Заклинатель
|
|
Тяжелая, Легкая, Магическая |
|
Информация о важном контенте
Чтобы быстро пройти диапазон уровней 85-99, Вам понадобится информация о важном контенте игры.
- Подклассы
В дополнение к основному классу, персонаж может использовать Подклассы. Каждый персонаж может иметь 3 подкласса, один из которых может развиться во второй класс и пройти Перерождение. На 85 уровне Вы можете пройти задание "Красная нить судьбы" и получить возможность добавить подкласс. Артеи не могут иметь подклассов и получать умения, сертифицированные от подкласса.
Если Вы хотите подробнее узнать о системе подклассов:- Подклассы {гайд?}
- Сертификация умений подклассов
Когда подкласс достигает определенного уровня, персонаж может получить дополнительное умение, влияющее на основной класс. Для получения подобных умений используется сертификация умений подкласса. Сертифицированные умения действуют на основной класс, второй класс и все подклассы.
Чтобы сертифицировать умения подкласса, необходимо пройти квест "Новый дух, новый облик" и изучить Трансформацию в Ониксового Зверя.
Если Вы хотите подробнее узнать о сертификации умений подклассов:- Подклассы {гайд?}
- Дворянство
Персонажи, получившие статус Дворянина, могут использовать уникальные возможности телепортации, умения и другие бонусы. Чтобы получить статус Дворянина, необходимо развить один из подклассов и в процессе развития пройти квест "Дворянин, испытание духа".
Только Дворяне смогут участвовать после Перерождения в Великой Олимпиаде. Если Вы хотите подробнее узнать о Дворянстве:- Дворянство {гайд?}
- Второй класс (дуалкласс)
Один из трёх Подклассов может быть выбран для развития во второй класс (дуалкласс) и достижения 99 уровня. Дуалкласс также может пройти Перерождение.
Чтобы получить дуалкласс, необходимо пройти квест "Начало новой судьбы".
Если Вы хотите подробнее узнать о системе дуалклассов:- Второй класс {гайд?}
- Улучшение умений
После Перерождения на 85 уровне персонаж получает новые умения и может их улучшить. Доступ к улучшению умений открывается кнопкой из окна умений (Alt+K). Для каждого умения доступны различные пути улучшения, внимательно ознакомьтесь с бонусами каждого из них.
Для улучшения умений потребуются Кодексы Перерождения, Адена и SP. Если Вы хотите подробнее узнать об улучшении умений:- Улучшение умений {гайд?}
- Краски
Изменить уникальные базовые параметры каждой расы можно при помощи татуировок. После Перерождения персонажи могут использовать только особые краски ранга R.
Краски ранга R можно приобрести в каждом городе у NPC Торговец Волшебными Красками. При покупке Вы выбираете только характеристику краски и получаете случайную. Если Вы хотите подробнее узнать о красках и татуировках:- Краски {гайд?}
- Татуировки {гайд?}
- Редкие Кристаллы Души
Нормальному и благословенному оружию ранга R и выше можно придать сразу два особых свойства при помощи редких Кристаллов Души. Скованному оружию нельзя придать два особых свойства.
Редкие Кристаллы Души бывают желтые, аквамариновые и фиолетовые, получить их можно, убивая Рейдовых Боссов. При Кристаллизации предметов ранга R можно получить части редких Кристаллов Души, которые можно обменять у Торговца Маммона или у Мастера Ишумы на целые редкие Кристаллы Души. Подробнее в теме:- Редкие особые свойства {гайд?}
- Великая Олимпиада
Дворяне, прошедшие Перерождение, могут принять участие в соревновании за титул Героя. Великая Олимпиада длится 1 месяц, бои проходят в пятницу и субботу с 18:00 до 24:00. С 1 по 3 неделю бои проводятся вне класса, с 4 по 5 внутри класса.
По завершении Великой Олимпиады определяется Герой в каждом классе. Герои получают Оружие Героев и другие награды. Все участники Великой Олимпиады получаютСимвол Олимпиады, их можно использовать для приобретения товаров у Управляющего Олимпиады. Подробнее в теме:
- Великая Олимпиада {гайд?}
- Система наставников
Система наставников призвана облегчить адаптацию новых игроков и тем, кто давно не играл, такие игроки получают Сертификат Ученика. Учениками могут стать персонажи, не достигшие 85 уровня. Наставниками могут стать персонажи 85 уровня и выше, прошедшие Перерождение.
Когда ученик повышает свой уровень, наставник получаетЗнак Ученика, которые можно обменять на различные предметы у Помощника Наставника в любом городе. Подробнее в теме:
- Обмен доказательств
Выполняя некоторые квесты, можно получить различные доказательства, которые можно обменять у NPC на рецепты и части для изготовления оружия и брони ранга R и выше.НазваниеКак получитьNPCОбменивается наДоказательство Верности- Траджан, нечисть Подземелья Рудника
- Редкие материалы для исследований
Шутгарт:
ФиларРецепты и части оружия Реквиема Доказательство Обещания- Прилагая свои скромные усилия
Древний Город Аркан:
ЭнсониРецепты и части брони Ада Доказательство Жизни- Вслед за неизвестным запахом
- Незнакомый садовник
Древний Город Аркан:
ЭнсониРецепты и части оружия Апокалипсиса и аксессуаров Ада Доказательство Героя- Чучела древних героев
Древний Город Аркан:
ЭнсониРецепты и части брони Кадейры (R95) Доказательство Ада- В Перламутровый Зал
- Испытание, Огненный Коридор
- Коралловый Сад
Парнас:
ФиоренРецепты и части брони Айдиоса (R99)
- Создание предметов
Создание предметов экипировки - прерогатива расы Гномов, другие расы могу создавать украшения, эликсиры и т.п.
Независимо от расы все персонажи после Перерождения смогут создавать Рубахи, Пояса и Браслеты ранга R и выше, а также Заряды Души и Духа ранга R. Получить рецепты и ингредиенты для создания данных предметов можно в обмен на Знаки Путешественника. Подробнее о создании предметов в теме:- Создание предметов {гайд?}
- Знак Путешественника
Персонажи 85 уровня и выше во время охоты в группе могут получить Знак Путешественника. Знаки путешественника бывают четырех типов - Верность, Обет, Искренность и Воля, получить Знак Путешественника можно только один раз в день.
Знаки Путешественника можно обменять после прохождения временных зон у Членов Гильдии Путешественников на Печати, а их в свою очередь там же можно обменять на Кристаллы Души, Камни Жизни, рецепты и материалы для обычного создания предметов, талисманы. Подробнее о знаках в теме:- Знак Путешественника {гайд?}
Последнее редактирование модератором: